Sunday, August 26, 2007

#001, Part 5 (Finished!)

I finally got around to some sanding last week and ended up finishing my first board. I must say that I've gained a whole new respect for those who glass and sand surfboards (seems like its always the shaper who gets all the glory).

Picking up where we left off last time, the boards been hotcoated and is ready for sanding. I started with the fins...


My little handheld sander worked great for sanding the fins. I started with 80 grit and worked my way up to 220.

Wet sanded to 320 grit. Mmmm, smoooooth. Pesky airbubbles can be seen in the fiberglass weave at the base of the fin...


After the fins are done, I gather my sanding pads and cut some sandpaper (80, 120, 150, 220, 320) in preparation for sanding down the rest of the board. The little sanding pads (SuperSoft Blue, and Soft Yellow) came in real handy for those tight areas around the fins.


Just when I thought I was getting the hang of the electric sander, I accidentally nicked the leading edge of the trailing fin with some 80 grit. It only took a slight touch to put these two "notches" into the fin. Grrrr!!!! Lesson learned: Sand/finish the fins after the rest of the board.


Nothing to do but do an impromptu fin ding repair. Start by rough sanding and taping off the area...


...reinforce and cover the damaged edge with fin rope...


...now cover with glass. I saturated the repair down with some sanding resin and cut away excess glass along the tapeline once the resin had kicked. Sanded smooth after that.


A similar mishap happened on the nose of the board. Again, with 80 grit, I accidentally hit the nose too hard and burned through to the stringer and foam. Time for another repair...


By the time I got around to sanding the rails, my arms were weak and shaky from wrangling with the (now heavy) electric sander (plus, I wasn't in the mood for another ding repair) . So, I decided to do the rails by hand...


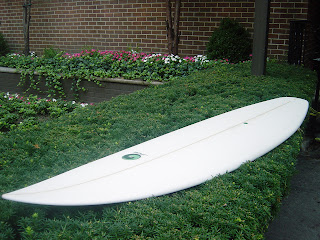
And finally, after sanding the whole thing down with wet 320, my first board is officially done. What a proud moment!..


Personally, I thought the actual shaping of the foam, while involving the most creativity, was the easiest part of the whole process. Most of my time and energy was spent in glassing, hotcoating, and sanding. I really have a newfound respect for those unnamed guys/gals who harden and shine these boards to their final state.

BTW, special thanks to everyone at Swaylocks and the NewYorkSurf.com shapers forum for guidance and encouragement. I would still be chasing my tail if it weren't for you guys! Also thanks to Stephen So for logo work.

kc


Tuesday, August 21, 2007

Could it be????

After almost 6 months of waiting....could it be?....is it finally ready? Could this be my "olive greeny quad"?

Spent some time last weekend working on fins/finboxes for #1, #2, and #3. Pics coming soon...

kc

Thursday, August 16, 2007

#2 and #3, Part 2

Time for more pictures and shameless self-promotion of my amateur skills. These are some pics from the past few nights. I've been trying to finish the laminating/hotcoating phases of these two boards before I start sanding my #001 along with these two and making the place all dusty. It seems like groundhog day doing boards in batches like this, things get kind of repetitive, but I suppose its good practice. I sort of miss shaping right now though, I'm about ready to be done with the glassing portion of the program.

Cutting the glass for the deck, I believe there's already a second layer under there cut to the edge of the rail. I decided to do a free lap this time, since its a clear layer and it seemed pointless to do a cutlap that would just be clear.


Nice to have my digital camera instead of my crappy phone camera, makes the details pop...


Air bubbles/pockets...


Cleaning up my free-lap from the deck before the hotcoat. Small surform works well, but gets gummy and annoying.


Some more glass trimming. I found that it helped to turn the lights out on one side of the room which reduced glare on the cloth and allowed light from the other side of the room to shine through. This allowed me to easily see the edge of the board and judge how far/close I am when trimming...


Ok, so the ink from the logo does not like resin. Here (dunno if the picture shows it well) some of the color from the logo bled up toward the nose of the board as I squeegeed the resin along. Need to find a better way to print (currently using laser color printer on rice paper). Hmm...


Look, the board has acne. Actually, this is what happens when you mix your resin too vigorously and your hotcoat pour has too many bubbles in it...


Preparing to hotcoat the bottom, taping up to the edge of the deck hotcoat. The catalyzed lam/glass looks kinda like snake skin...


Hmm...bug. The hotcoat was already gelling , and I didn't want to mess with it, so I left him in there...


Previously, I was nervous about cutting into foam with a razor blade while doing my cutlaps. I didn't feel totally comfortable doing this either...cutting a big hole into my stringer/board...


Pretty painless actually, the jig made it very easy. Now ready to set the leash plug...


Excess resin gets sanded away...


Some random shots of the space. I always like seeing other peoples workspace for some reason, so here's mine. You can see the #001 in the background. Can't wait to sand those bamboo 101 fins, I only hope they'll look halfway as good as these.


You're not havin' fun till you've got wads of blood colored resin and cardboard stuck to the bottom of your shoes....


Waves finally on the way tomorrow and this weekend!

kc

Wednesday, August 8, 2007

#2 and #3, Part 1

Last night I thought I'd spend the evening trying my hand at tints and cutlaps. My subjects were two funboard twins measuring 8' x 22" x 2.75" each. I started the night only intending to do the bottom lam/cutlap on one board, but by the end I was "in the zone" and decided to do the second board too.

The first order of business was to rig up some type of rail tool to draw in my cutlap guideline. I'd seen someone on Swaylocks do something similar to the following, though its a temporary solution. Still, it worked fine and was quick to assemble/disassemble...


Check out the hard core hitchhiker's thumb...haha!...


Cutlap outline drawn in...


Tape off at the line. Would've been handy to have some paper to tape off in the middle so I didn't have to waste so much masking tape...


Getting ready to mix in the tint now. Initially when i mixed the tint, I had no idea how much to use. I just went a little at a time till I got the color I wanted (which required mixing in a touch of red too)...


Ok, I've already pulled the glass, and cut excess away. Here goes nothin'...


Well, after running out of resin, and having to scoop some off the floor (lol!), I got the thing covered and my laps tucked under. I made the mistake of concentrating on the flats too much and forgot about the laps. By the time I got around to the laps, I was almost out of resin in my (second) bucket. I mixed up 1.5 qts, when I should've done 2qts. Lesson learned. Turned out alright for my first tint...good enough for me at least.


The laps are a bit messy in the ends. I didn't do a great job of cutting the wedges out so the glass lays nicely. There's some overlaping, some bubbles, and some uncovered spots...but no major catastrophes.


Poor little latex glove, didn't stand a chance...


Turned over the board after resin began gelling. Made sure to cover the stands w/ waxpaper so the upside-down masking tape on the stand doesn't pull/move the cloth which is still tacky at this point...


Went at it with the razor blade. Cut along the tape line as straight as possible while the cloth is still at its soft/leathery state. This is a bizarre feeling, I'm cutting *into* the foam here. But, thats how they say to do it, so be it...


After cutting all around, pull up tape. Making sure to pull towards the center so the lam doesn't accidentally peel off...


I read somewhere that instead of sanding the laps flush with the foam, some people just push the lap *into* the foam till its flush. I figured I'd give this a try, but after a few minutes of pushing with my thumb and a popsicle stick, I needed a better/easier way. So, after rummaging around the shop for a few minutes, I came upon the idea of rolling the edge of a paper mixing bucket along the lap edge while applying downward pressure. Helps to have one hand inside the the bucket moving it along, while the other is applying the pressure. You can roll along pretty quickly this way and cover a lot of ground without getting your gloves/hands sticky. Still need to clean up the laps a bit with some grinding/sanding, but the laps are flush now. Oh, you can see I'm shirtless, but don't try this at home. ALWAYS keep protective clothing on. I got a tiny smudge of resin on my stomach, and I could feel it burn in minutes. (BTW, where is my hairline??...wow, I must be getting old)


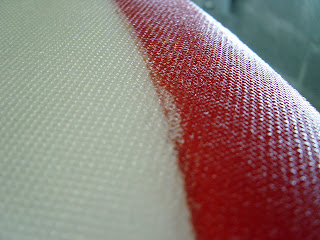
Did the same thing on the second board, but this time in a blood red. Ya, I dunno why I like to make things difficult for myself. They say to stay away from dark tints in the beginning. Easy to see flaws and mistakes. What can I say, I like to challenge myself sometimes...(actually, the order called for a dark red)


Not bad I guess. Somehow it always looks good from this side...


Looks like a crime scene eh? "Honestly, officer, I'm making surfboards in here!!!"


Here's a little booboo after pulling up my tape. Whats the recommended procedure here? I ended up shaving it away with a razor blade...


First cutlap, first tint, two boards, and one crime scene. All in a night's work (well, 4 hours work)...


Neeeeeeed waaaaaves.... :(

kc